Three randomly selected winners will each receive a $25 Gift Code to the ODBD Website just for commenting on the Design Team cards! You
have until June 2, 2017 at 9:00 p.m. EDT to leave your comments on the
Designers Blogs for a chance to win! The Winners will be posted on the
ODBD Blog on June 3rd so be sure to check back there to see if you won!
If you have not had the chance to view the entire release, you can do so HERE.
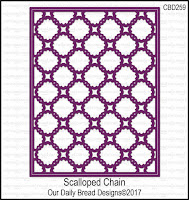
For my first card, I used the new stamp set, Long Lasting Love for the gorgeous cake image. I stamped with gray ink, colored with watercolor paints, and hand cut the image. I used the ODBD Tri-fold Card kit (in white) to create my card base. I used the brand new Wedding Wishes Paper Pack to decorate the card, and then I added the gorgeous new die cut, Scalloped Chain, and mounted that on the front of my tri-fold, extending it all the way across the opening to create an A2 sized front. You could see through this entire panel, and I wanted to use the new Mr & Mrs. die on the front, but wanted it to show up better than it did directly on the die cut background. So I added a square of the design paper, then the Mr & Mrs die cut. I matted with a dark gray square (from the Wedding Wishes pack) on the other side of the die cut to finish it off nicely when the card is open. On my inside panel I cut squares of two shades of gray and one of patterned paper from the wedding paper pack. I left my center pop up panel blank to add a sentiment when I need it, but you could always stamp that panel or hand write on it before you adhere it.
Here is another view of the tri-fold card and how I altered it by adding a peek-a-boo layer with the Scalloped Chain Background die cut. To finish the card I used three tiny blossoms which I cut from the Roses die set, and I added Stickles and some Wink of Sella for a little glitz. I mounted the blossoms and leaves from the Fancy Foliage die set on to a tiny little white satin bow.

For my next card, again I used the Mr & Mrs Die cut, the Long Lasting Love stamp set, the Scalloped Chain Background die, as well as past releases Vintage Borders Die and Double Stitched Pennant Flags Dies, and for the flowers, I used Bitty Blossoms and the tiny die in the Roses die set, and a Fancy Foliage die.

I used a silver paper to back my Scalloped Circles die cut in white, and I heat embossed the cake image and sentiment from the Long Lasting Love set in silver. I hand cut the cake and used a little watercolor paint to give a touch of color. I die cut the Vintage Label from white and mounted that on the background die, then added the sentiment tucked under it just a bit, popped up the cake on foam dimensionals, and added my flowers and ribbon. The finishing touch was tiny pearls. This card was simple to make and is very mail-able too! We all love that, right?
To recap, here are the NEW ODBD PRODUCTS I used today:
In order to not miss a chance at one of the prizes, be sure to visit my DT sisters and leave them a little love in the form of a comment! Here are the links:
Thanks so much for stopping by!
May God bless you all!


