Monday, December 12, 2016

A Pennant-ful Package


Hello friends!  I hope you are all doing well!

Today I'm sharing a Christmas package I'm sending in the mail shortly, and how I decorated it.  I used plain craft colored wrapping paper, and simple twine which I wrapped around the package twice.  Then I cut a bunch of pennants from the new ODBD Dec. release, as well as a few stars from a past release.  I adhered them all with foam tape for a popped up effect.  The sentiment in the middle is stamped with Real Red ink and I cut the pennant die so that the top did not go through the cutting machine, and then I reversed a die on a fold line so I could have a folded tag and my greeting is written inside that tag.  The green star is stamped with Gumball Green ink.


While I might not do this for just any package... for a special one I think it says "I love you enough to do this"!  Yes, it does take a little time but I think the result is worth it.  Hope you enjoyed it as well!

Blessings to you.


Monday, December 5, 2016

Handle With Prayer


Hello friends!  Today I'm sharing a new fold that I'll call a side easel.  I first saw a picture of one like this on Pinterest but there were no instructions with it and so I set out to figure it out.  I did not take photos as I was making this but if there is interest enough, I can try to do a tutorial after the first of the year. It was very simple, especially if you have made a regular easel card before.  Basically all you do is create your easel the size you want it, and cut away the top half of a folded card to leave only a top fold over piece the size and location that you want your easel to be.  Fold that piece in half (so the top folds downward when open) and then cut a top panel to adhere to this folded piece.  Voila!  A side easel! (The image below should help you visualize a top fold card with everything cut away except the easel base itself).   If you have not made an easel card before there are tons of tutorials on line that you can search for on Google and then I think you'll understand my description.  As I said... if there is enough interest in this, I will try to do a tutorial after the first of the year when I have more time to put it together.

The ODBD products I used today are the newly released Handle With Prayer stamp set, the matching Praying Hands Die, the new Praying Border Die, the new Deco Border Die, and the Fillagree Frames Dies and Blushing Rose Paper Collection


The card is embellished only with a few half pearls.  The image is colored with Copics and cut with the matching Praying Hands Die.  It folds flat and is very mailable!  We like that!!! :)

Thank you so much for stopping by today!  I love knowing you were here, and I hope you are enjoying this special time of the year when we celebrate our Savior's birth! 

Hugs,

Thursday, December 1, 2016

Welcome to the December ODBD release!

 Hello friends!  Welcome to the ODBD December release!  I don't know where the time has gone but here we are... it's almost Christmas!  I hope you all are well along on your Christmas cards by now, and if so, this month's release will be a welcome change!  As always, there will be prizes!

Three randomly selected winners will each receive a $25 Gift Code to the ODBD Website  just for commenting on the Design Team cards!  You have until December 2, 2016 at 9:00 p.m. EST to leave your comments on the Designers Blogs for a chance to win!  The Winners will be posted on the ODBD Blog on December 3rd, so be sure to check back there to see if you won!
My first card today is a Book Fold card from the Fancy Folds Card Kits at ODBD.  I used the following  products on my "Praying" card : 


I stamped the sentiment with blue ink on white card stock.  I cut the sentiment panel with a Pierced Squares die, and added a Deco Border die to the top and bottom.  After adhering my design paper to the inside of the card, I adhered the sentiment panel to the left side of the book fold.  I stamped the praying hands with the same ink and die cut with the matching Praying Hands Die, and adhered that to the right side.  I used Bitty Borders to trim the book fold.  Below is the front of the card.  I used the same paper pack to die cut the new Praying Border die, which I love!  I made a white frame by cutting a Pierced Square and inside of that a Square die, then I adhered a Deco Border die to the top and bottom of the frame on the inside.  I adhered the Praying die to the outside.  To give the word die some strength, I die cut it from white card stock and adhered the design paper cut to that.  I popped up the frame onto a square of white card stock that I had embossed with a Sizzix folder.  I added Bitty borders to the top and bottom of the card and tiny blue half pearls.


For the card below, I had some fun with the bright bold papers in the Birthday Brights Paper Pad.  I die cut numerous banners from this paper using the new Pennant Flags Die set and the Double Stitched Pennant Flags set.  I stamped the sentiment from the new Pennant Flag Verses set with Baja Blue ink and adhered all of the flags with dimensional foam tape.  I used Bakers twine and tiny buttons and a Cuttlebug embossing folder and a Double Stitched Rectangle die to cut the embossed panel. 


To recap, here are the new products I used today:

http://ourdailybreaddesigns.com/handle-with-prayer.html

http://ourdailybreaddesigns.com/deco-border-die.html

http://ourdailybreaddesigns.com/praying-border-die.html

http://ourdailybreaddesigns.com/praying-hands-die.html

http://ourdailybreaddesigns.com/pennant-flags-dies.html

http://ourdailybreaddesigns.com/double-stitched-pennant-flags-dies.html
http://ourdailybreaddesigns.com/pennant-flag-verses-clear-stamps.html
 Thank you so much for stopping by!  If you have not had a chance to see the entire release, you can do that HERE .

Please visit my DT sisters for more inspiration:

Cathy * Grace * Kathy * Robin * Lisa * Dawn * Sandee * Angie * Julie 
Sabrina * Chris * Diana * Lori * Anita * Helen


Tuesday, November 15, 2016

Special Holiday Release!

Hello friends!  Welcome to the ODBD Special Christmas Release!

This is a little surprise release Kelley has for you, and like all the releases, there are opportunities to win prizes!  
Three randomly selected winners will each receive a $25 Gift Code to the ODBD Website  just for commenting on the Design Team cards!  You have until November 16, 2016 at 9:00 p.m. EST to leave your comments on the Designers Blogs for a chance to win!  The Winners will be posted on the ODBD Blog on November 17th, so be sure to check back there to see if you won!

My first card is made using the ODBD Double Display Card Kit to create my fancy fold!  This card spotlights the awesome new release, Holly Oval Die on my front panel, as well as the new Holly Jolly Paper Collection 2016.  I also used this month's regular release, Merry & Bright, Christmas Lights Dies, and past releases: Layered Lacey Ovals, Layered Lacey Squares, Pierced Rectangle Dies, Log Cabin Quilt Dies, Peaceful Poinsettias, and Lovely Leaves Dies

I have to just say I love this holly paper!  The traditional colors and patterns are always a go to combo! It's also so much easier to make these fancy fold cards when you have the card base already cut and scored as they come in this kit!  I measured the panels and cut design paper to fit the panels.  I cut the Holly Oval from green mirrored paper and mounted that on a white Layered Lacey Ovals die cut.  I cut my gold ribbon and passed it through the Layered Lacey Ovals die, then I adhered the left side of the oval to the left side of the card front.  (I had tried the alternative first, which is to make the oval panel and ribbon removable) but I preferred it this way after experimenting a bit.  I decorated the front with several cuts of Peaceful Poinsettias from red card stock which I had spritzed with gold glimmer spray.  I did the same with the greenery from the Lovely Leaves Die set, and finished off with some tiny gold flower center stickers. 

For the inside, I stamped the sentiment and the Christmas lights with VersaMark, and heat embossed with gold.  I cut the lights out with the coordinating Christmas Lights Dies, and placed them along the top of the open card.  I cut the sentiment with a Pierced Rectangle die, and matted that with a Layered Lacey Squares die cut.  On the bottom I just added a couple holly sprigs from the Lovely Leaves Die set and some more gold stick-ons.

For my second card (below) showcasing the Holly Oval Die, I used white card stock and gold mirrored paper to create a clean but elegant card.  I used a past release, Sending My Love Stamp/Die Duo to die cut my word, Sending, and to stamp and heat emboss the words Christmas Blessings.  I cut that sentiment panel with one of the Log Cabin Quilt Die strips, and I cut three Peaceful Poinsettias die cuts from white, and three Merry Mosaics die cuts from gold and spritzed the poinsettias with gold glimmer spray. I shaped them a bit and adhered all to a white embossed panel, which I had embossed with a Sizzix Holly folder.  I cut that embossed panel with a Double Stitched Rectangle die.  I matted that with another white layer cut with the outer border from the Snowflake Sky die set. I popped that all up on a gold mat, using foam tape, and then I  adhered that to the white base.  So while it's a pretty layered up card, it is also clean and I actually love how it came out. 


To recap, here are the NEW SPECIAL RELEASE products I used today: 


The products I used today using the Nov. 1 release are:


To see the inspiration the rest of the team has for you, please visit the links below: 
Grace * Cathy * Chris * Kathy * Sabrina * Robin
Diana * Sandee * Lori * Helen * Julie

You can see the entire Special Release HERE

Thanks so much for stopping by!

Tuesday, November 8, 2016

Jesus is Born!


Hello friends!  I hope you are all doing well! As I post this I am listening to the election results as they come in.  Who knew this election would be so close!  Well... I'm so thankful to know that no matter who wins this election, God is still on His throne, and Jesus is my King!

I am sharing another card made using the new Jesus Loves You Stamp/Die Duo set.  I used last months Holy Night Die to cut my focal image from brushed gold card stock.  I cut the word Jesus from the same paper, as well as a mat which I cut with the outer border die from the Snowflake Sky Die set.  I used several cuts using the Leafy Edged Border dies to create my "hills".  I sponged them lightly with Brilliance Galaxy Gold ink and adhered together. I added the hills to my background which I had sponged with distress ink in stormy sky.  I positioned my Holy Night die as well as the Jesus word die cut and adhered.  I heat embossed the "Is Born" sentiment in gold and cut with the Log Cabin Quilt Dies.  I created a pop up frame for my focal point by cutting and layering three die cuts made using a Pierced Rectangle and Rectangle die and passed through the die cut machine together. I used foam tape to pop up the layers.  To make the star pop a little more, I cut another star from the Holy Night die set from silver glitter  paper and adhered over the brushed gold one.  

This was a simple card and wouldn't be too hard to do in mass, though the added frame layers might be left off if doing a mass production.  I hope you enjoyed my sample today, and thanks so much for stopping to look!

Hopefully next week I will have good news to share.  I had my first chest CT scan yesterday and should get those results next Monday.  I have also finished up my last infusion as of last Tues.!!!  I am having some issues with where my lymph nodes were removed but hopefully with time that will improve.  I have learned that I can't do as much with that arm as I used to do as it seems to mess up the drainage of lymph or something.  It just gets very sore and swells some.  But it's ok!  I'm just thankful to be getting to the end of a LONG year of treatment, and praying there won't be need for any more .... ever!  So... hopefully next week I will have good news to share on the CT Scan!

Praying for so many right now.... and thanking you for all your prayers for me!!! 

Tuesday, November 1, 2016

Welcome to the Our Daily Bread Designs Nov. Release!


Hello friends!  Welcome to the Our Daily Bread Designs Nov. release Blog Hop! 

Three randomly selected winners will each receive a $25 Gift Code to the ODBD Website  just for commenting on the Design Team cards!  You have until November 2, 2016 at 9:00 p.m. EDT to leave your comments on the Designers Blogs for a chance to win!  The Winners will be posted on the ODBD Blog on November 3rd, so be sure to check back there to see if you won!

For the card above,  (yes, it does fold flat) I used the ODBD Surprise Box Die to create a fun pop up snowflake card.  The NEW products I used are:  Merry and Bright, Christmas Lights Dies, Snow Crystals, and the design paper is Snowflake Season Paper Collection.  I also used Balloons and Streamers dies and the Log Cabin Quilt die from a past release.  This was so fun to create!  It goes together easily with the ODBD Surprise Box dies.  The surprise box die easily cuts both the box and layered inserts,  plus inside panels to support the box's square shape and to which you adhere your streamers, etc.  After adhering the design papers, I die cut lots of snowflakes from pink and white card stock, and from glittery gold  and glittery white papers from American Crafts.  I adhered the snowflakes to streamers and/or little strips of paper,  and adhered them to the inside of the box.  I heat embossed the sentiment and the  Christmas lights with gold, cut the sentiment with the Log Cabin Quilt die, cut the lights with the new Christmas Lights Die, and adhered. 


For my next card, I used the Merry and Bright stamp set, and numerous dies:  Snowflake Sky, Snow Crystals, Peace Border, Double Stitched Rectangles, and Log Cabin Quilt dies.  I also used the Winter Paper Collection 2014.


To create this card I started with my white base, added a glitter silver paper layer which I cut with the Snowflake Sky outter die, then layered a thin glitter gold mat, followed by the design paper from the Winter Paper Collection 2014 which I die cut with a Double Stitched Rectangle, and topped that with a white die cut Snowflake Sky layer.  I die cut the Peace Border from both white and glitter gold, adhered them together for a shadow offset, and adhered to the card.  I cut three snowflakes from the Snow Crystals Die set: one from silver glitter paper, one from white, and one from gold glitter paper, and popped them up in a layered design.  The sentiment "To You" is part of one of the sentiments in the Merry and Bright set.  The full sentiment says "Peace to You" but since I wanted to use the large Peace Die, I only inked up the "To You" part with VersaMark, and heat embossed that in gold, then cut with a small strip from the Log Cabin Quilt Die.  It's much prettier in person with the hints of sparkle from the silver and gold glitter paper.  I finished with a small sheer silver bow.

Here are the New Release products I used today:


To view the amazing samples from the rest of the design team, please visit their blogs:
Cathy * Dawn * Lori * Robin * Julie * Sandee * Anita * Helen * Angie * Chris * Grace * Lisa 
Sabrina * Kathy * Diana 

Thanks so very much for stopping by!
Blessings,

Saturday, October 15, 2016

Nov. Pre-Release! Jesus is the Reason for the Season!


Hello friends!   Today Our Daily Bread Designs is doing a Pre-Release and it is just a beautiful one! More details on that below!  

 This is a sample I made using Snowflake Sky Die Background, Snowflake Crystals, and the new stamp/die duo - Jesus Loves You.  I also used some gorgeous new paper - Snowflake Season Paper Collection.  I used glittery silver paper from American Crafts and White card stock, along with some pretty red crystals and a past die release - Leafy Edged Borders.

I love stacking these snowflake dies together and mixing colors for the layers.  It gives great dimension without lots of bulk for mailing.  I love this sentiment and I hope this is true for you and your celebration of the Christmas holiday!  There are so many wonderful sentiments in this Jesus Loves Me set!  I will use this year round I'm sure!

Here are the new products I used today:


Today through October 31st, Our Daily Bread Designs is offering Pre-Order Bundle Specials on the November 2016 Release!   All November 2016 Bundle pre-orders will begin shipping on November 1, 2016 or sooner, please see the ODBD Blog (link to ODBD Nov Pre-order Post) for more details. 
http://ourdailybreaddesigns.com/pre-order-special-november-2016-bread-basket-bundle.html

http://ourdailybreaddesigns.com/pre-order-special-november-2016-snowflakes-dies-bundle.html

http://ourdailybreaddesigns.com/pre-order-special-november-2016-snowflakes-dies-bundle.html

For more inspiration using the ODBD November Pre-Order products please visit the other participating Designers' blogs:
Sandee * Cathy * Lisa * Lori * Grace * Dawn 
Robin * Sabrina * Julie * Diana * Helen

You can see all the details on the bundles being offered as a Pre-Order Special by visiting the 

Thanks for stopping by! 

Monday, October 10, 2016

Christmas Cards with ODBD Christmas Note set


Hello friends!  I'm sharing a couple more cards made with the ODBD Oct. release!  This time I'm focusing on the new Christmas Note set.  The image and sentiment are both from this set.  I stamped them with memento ink and colored with Copics.  The paper is from the Christmas Paper Collection 2013.  I cut my rectangles with the Double Stitched Rectangle dies, and the holly leaves and pine boughs are die cut from the Lovely Leaves set.  I added white water color splatter, then Stickles to give a little glitter to my snow.  I also added it to the leaves.  I added crystal "berries" and made a tiny cross over the letter "t" in the sentiment. 

The second card also features the Christmas Note set, as well as the new Merry Christmas Border.  I again stamped with Memento ink and colored with Copics but kept a "cleaner" look by not sponging the edges or splattering the white paint as I did above.  I cut the image with the Vintage Labels dies, and matted with the Vintage Borders.   I created the mat for my image by die cutting four corners from the Fancy Ornament die set from a past release. I adhered them on a white embossed panel that was cut with the Pierced Rectangle dies.  I adhered the Merry Christmas Border at the bottom of my card, and adhered the image panel raised up above the fold to make a "tent topper" card.

Thank you so much for stopping by!


Wednesday, October 5, 2016

Christmas Cards Featuring the ODBD Holy Night Dies

 Hello friends!  I hope you are all doing well and enjoying this  fall season!

Today I'm sharing a couple of cards I made using some of the new products at Our Daily Bread designs.  For the card above, I used the new Christmas Card Collection 2016 for the background of my card.  I love this paper, and the nativity scene on the paper, done in black, makes a wonderful "shadow" for my die cut Holy Night die that I cut from white card stock.  The sentiment is from the new Christmas Note set, cut with a Pierced Oval die, and the angel is popped up on that panel.  My base layers are all cut with the ODBD Pierced Rectangle dies.  This is one of my favorite cards for mass producing.  It went together quick and easy yet it doesn't feel that simple, perhaps because all the white Holy Night images are popped up. That doesn't really show in the straight on photo, but I do like how it came out.... and quick is always good!!!

For the card below, I used the same Holy Night die, but cut it from black.  I also cut a Pierced Rectangles frame to sort of spotlight it.  The paper is from the ODBD Christmas Paper Collection 2014 and was one of my favorites!  I added hills to the background by cutting white card stock with the Leafy Edged Border dies.  I cut two die cuts of the Merry Christmas Border.... one from white and one from black so I could shadow the text.  I sponged my hills and edges of the card and adhered it o a white base with a thin black mat.  Tiny crystals and crystal star finished it off.


Thanks so much for stopping by!  I hope you enjoyed these samples.  I am really loving this month's release!  

Saturday, October 1, 2016

Welcome to the Oct. ODBD Release!

 Hello friends!  Welcome to the Our Daily Bread designs Oct. release hop!!!  

Three randomly selected winners will each receive a $25 Gift Code to the ODBD Website  just for commenting on the Design Team cards!  You have until October 2, 2016 at 9:00 p.m. EDT to leave your comments on the Designers Blogs for a chance to win!  The Winners will be posted on the ODBD Blog on October 3rd, so be sure to check back there to see if you won! 
For my card above, I used  the gorgeous new set Home For The Holidays for my image and the sentiments.  I also used the Snow Flake Mini  from a past release.  The dies I used are the Gilded Gate, Squares, and Pierced Squares.  I used the ODBD Tri-Fold Card Kit for this shaped card, and decorated it with the new Christmas Card Collection 2016.  
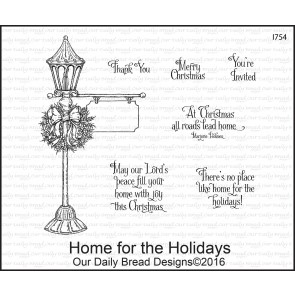
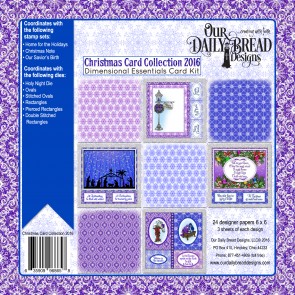
To create this card, I  measured and cut the design paper pieces, sponged the edges and adhered to the tri-fold card base from the ODBD Tri-Fold Card Kit.  I stamped the image  with Memento ink and colored with Copics.  I hand cut the lamp post and then coated the lamp post with Glossy Accents to make it more shiny.  When that was dry, I decorated it with some Glitter Snow-Tex.  I die cut the gate pieces from some packaging I had from a gift box, using the Gilded Gate dies.  The black is shiny and I loved how it looked on this wrought iron gate.  I stamped the Merry Christmas inside the sign, and the sentiment for the larger square panel with VersaMark, and heat embossed with black embossing powder.  I stamped the snowflake flourish image from the Snowflake Mini set in VersaMark around the square and heat embossed with Kaleidoscope embossing powder.  Then I made a mask for my sky line and sponged purple ink on the "sky" in the background.  I created an illusion of a road and snow banks by sponging a little gray on the lower white part of the square panel.  I sponged purple all around the perimeter using the emboss resist technique to pop those white glittery snowflakes a bit.  I cut this square with the ODBD Squares dies.   I used a Pierced Rectangle die to cut a mat from black card stock, and adhered all together.    I adhered the gate pieces and the lamp post to finish the card.  

For the card below, I again used the wonderful Home For the Holidays set, along with the new Merry Christmas Border Die, and I used the Ornate Oval dies, Ovals dies, Lovely Leaves dies, the ODBD Center Step Card Kit, and the Christmas Card Collection 2016.  
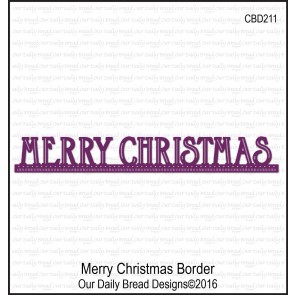
Having these fun card kits has made it so much easier and more fun to make these different folds!  I simply measured and cut my design paper, and adhered it to the card.  I stamped the lamp image with Memento ink and colored with Copics, and hand cut the image.  I sponged an oval die cut with shades of purple, embossed with a snowflake embossing folder, and adhered it to a white frame that was die cut with an Ornate Ovals die.  I adhered these to the center step card, and then adhered the lamp image on to it.  I adhered the new Merry Christmas die cut to the bottom of the card, and I cut several boughs using the Lovely Leaves dies, and layered them up on the oval panel, adhered and then added a little silver sheer bow.  I added little silver half pearls to the wreath and the boughs to finish it off.  I wish you could see the glitter of the "snow", but the camera just does not pick that up. 

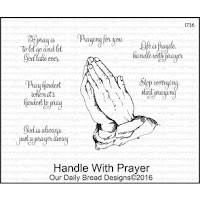
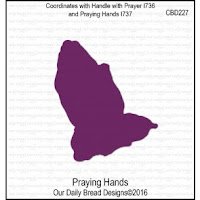
To recap, here are the NEW ODBD products I used today.  
You can click on the photo to go to the link:
http://ourdailybreaddesigns.com/home-for-the-holidays.html
http://ourdailybreaddesigns.com/merry-christmas-border-die.html

http://ourdailybreaddesigns.com/christmas-card-collection-2016-6-x-6-paper-pad.html

Thank you so much for stopping by!  I hope you enjoyed my samples today!  

By way of personal update, I am still plodding along but getting closer to the end of my active treatment.  I will finish up my infusions on Nov. 1!  I will have a chest CT scan on the 7th, and then see my Dr on the 14th, at which time I hope to hear the words I've been waiting for a whole year to hear!  Cancer Free is what I'm hoping to hear!  Thanks to all who are still praying for me!  I can't begin to tell you what that means to me!!!  I am beginning to feel more like myself as I gain strength.  My hair is beginning to grow back in but it's, ahem, very gray/white!  Not going to complain... it's hair!  Thankfully the infusions I'm still getting do not effect hair loss!  My hubby and I decided to take a real vacation this year, as it's been a rough one for our entire family.  So we enjoyed time away to refresh in Sept. All in all.... things are getting closer to "normal", though my new normal isn't exactly the same as my old normal was!  I do cherish your continued prayers, as they cannot do scans routinely, so you just have to wait to see if symptoms appear that would warrant a scan.   The other places breast cancer seems to usually spread to are the liver, lungs, bones and brain, though it can go most anywhere.  I think it's that uncertainty that's going to be hardest for me when treatments are finally done!  I will be on a hormone blocker for 10 years, and that hopefully will help prevent a recurrence but basically it's a wait and see situation.  This is where I'll need to speak truth to myself and work hard at not being anxious! I am already claiming several Scriptures as "mine" for this time.   So I do cherish your continued prayers!!!

 Philippians 4:6
Do not be anxious about anything, but in every situation, by prayer and petition, with thanksgiving, present your requests to God.

Now I'll send you along to see all the amazing inspiration the other designers have put together for you!

Sandee * Cathy * Dawn * Lori * Robin * Julie
Diana * Angie * Chris * Grace * Lisa * Sabrina * Kathy