So here is what you will need:
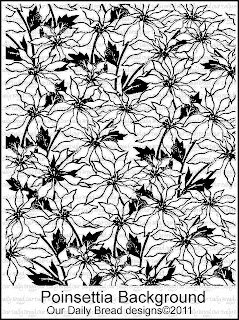
Our Daily Bread designs Small Snowflake Background Stamp and Sparkling Snowflakes set (coming Dec 1)
Our Daily Bread designs custom Tag Die
Score Pal or Score Buddy or the like
Blue card stock of choice
Ranger Perfect Medium, Stampendous Kaleidoscope Embossing Powder, Ranger White Embossing Powder
Spellbinders Mega Ovals (#2 die)
Vellum
Ribbon of choice
Tombow Metal glue or other strong quick drying glue
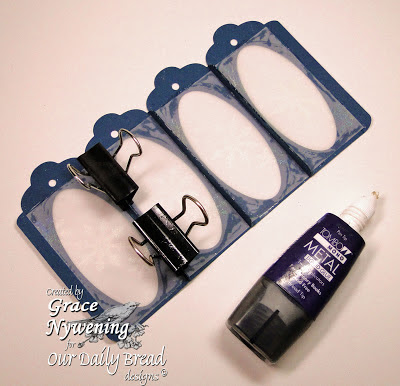
To begin you will cut four tags out of blue card stock, and stamp them with Perfect Medium and heat emboss with white embossing powder. Then center the #2 die from the mega oval die set, and cut the oval window out of each panel.
Score each tag 1/4" in on each side and burnish each fold.
Cut a square from the blue card stock 2 1/4" square for the bottom. (If you want to wait until your ornament is together so you can measure it exactly, that's fine. These were my measurements, but you could always come up with just a slightly different measurement on yours, so if your bottome piece doesn't fit, that would be my
recommendation)
Score the bottom square in 1/4" on each side, fold and snip into 1 side of each corner to the fold.
Cut 4 pieces of vellum to fit inside ornament (mine was 1 9/16"w X3 3/8" high). Stamp with an arrangement of three of the smallest stamps in the Sparkling Snowflakes set using Perfect Medium, then heat emboss with Stampendous Kaleidoscope embossing powder.
Now you will glue each 1/4" seam together using Tombow glue. (I clamped with paper clips for a couple minutes until set.) Next, run a thin bead of glue around each oval window, and insert the vellum, pressing down smoothly. Let dry for a couple minutes.
From here, you will glue your last seam to complete the square, and then after gluing the bottom corners, you cut, just slide that square up onto the four sides and glue.
Decorate as desired. I chose to just use 2 holes this time and added ribbon as a hanger with a knot on the inside of the luminary. You could also use all four holes and hang thin cord from each hole. It's all up to you! Insert battery operated tea light and enjoy!
That's it! Easy peasy and yet looks very pretty on the tree! I hope you'll give it a try... and don't forget to be back here on Dec 1 for a HUGE and fabulous release!!!! See you then!!!
I am entering this in the following challenges: 4 Crafty Chicks - Ornaments, Charisma Cardz - 3E, C10 - #47 Christmas with a twist, No Green, Gold or Red, Crimbo Crackers - , must be Christmas - #29 Anything holiday/festive Cute Card Thursday - Snowflakes, Little Miss Muffet Challenges - ) Tags or Gifts (made with tags, and as a gift), Pixie Dust Studio - Winter Holiday Creations, Sassy Studio Designs - SIO - #153 Christmas Anything BUT a Card and Our Daily Bread designs - Deck the Halls (ornaments)
Blessings,


