Hello friends!
We're still cleaning up the mess from the flood here on the lake, but I wanted to share something fun and different I tried. I did take a few pictures along the way to show you what I did. Forgive the background of my work spaces.... this was done not to be pretty, but to help you see the basics of the process.
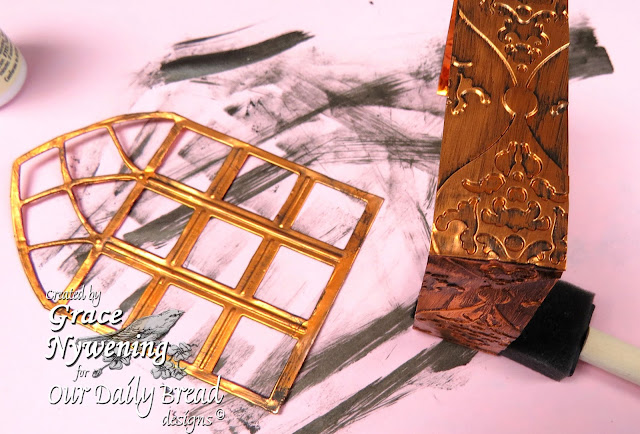
I decided to try using that real copper metal sheeting you can buy at craft stores in rolls, and see if it would die cut and emboss to make a candle holder band. To begin, I stamped the ODBD Cathedral Window- Wood with Stazon ink on acetate, cut it out with the outer part of the ODBD Custom Cathedral Window and Borders Die, and then on the back, I colored the window with Sharpies.
I tried die cutting and embossing the copper that I had bought at AC Moore, and was thrilled to find that it die cuts beautifully. I cut the copper, using both the inner and outer parts of the custom Our Daily Bread designs Cathedral Window and Border Die.
I then cut a 1" strip long enough to wrap around my glass candle holder like a belly band, to which I could attach the window die. I embossed the strip with an E-bosser embossing folder.
I antiqued all the copper with an antiquing medium I have had for some time.
I scored the band at the measurements needed to wrap my candle holder. I adhered the acetate to the back of the window with Tombow Metal Glue, careful to only dab the parts of the window that would be covered by the metal in case the glue would show after it dried. I then adhered the band to the back of the window with Aileen's Jewelry adhesive. I'm really happy with how this came out, as it has a real metal look and feel that just would not have come from paper alone, to say nothing of it's much stronger.
I hope you were in some way inspired to try something dfferent and create something pretty for your home or as a gift with this lovely window stamp and die set!
I am entering this in the following challenges:
Crafty Ribbons - No designer paper, Paper Crafting Journey - Anything Goes,
Until next time....
Blessings,


13 comments:
This is so wonderful.
Hugs Riet.xx
EGADS!! This is stunning, Grace! I can't wait to give this a try. Ohmygoodness...thanks for sharing!
What a phenomenal success this 'experiment' was Grace - absolutely beautiful!
Blessings
Maxine
Beautiful. Reminds me of a ceramic piece I do with "stained" glass windows in a church. Love it.
WOW This is AMAZING !!! LOVE IT !!!
Trying something different really paid off for you. I think your creation is gorgeous. Thanks for sharing it with us at Crafty ribbons! Hugs! xx
Wow!!! I`m so impressed! This is absolutely amazing! Love the aged look. This must have taken forever to create. Fantastic job, hunni! Also thanks for the sweet comment you left in my blog. Have a wonderful weekend. Hugs...Mona
This is gorgeous, looks like real stained glass windows that I love so much on old church windows!
Awesome, such a wonderful idea and it looks like something bought in a store not handmade, lovely details!
what a fab idea and so easy to make, yet so lovely, tfs, hugs, Marion
Wow...I am speechless..:) This truly is a work of art.
Beautiful work and stunning design. Thanks for joining our challenge at Paper Crafting Journey.
Big Hug, Iwona
I didn't know you used Sharpies, how cool!!! AWESOME project!!
Post a Comment