Showing posts with label Our Dail Bread designs. Show all posts

Friday, December 1, 2017

Welcome to the ODBD December Release!!!

 Hello friends!  Can you believe it's Dec. 1?  I seriously cannot!!!  Well... with the first of every month comes some exciting new goodies from Our Daily Bread Designs!  If you have a few more cards to make and especially if you have some small gifts worthy of a very special hand made gift bag... you don't want to miss this one!  The design team has been having a blast making all sorts of gift bags and sets.

As with all our releases, there are prizes! 
Three randomly selected winners will each receive a $25 Gift Code to the ODBD Website  just for commenting on the Design Team cards!  You have until December 2, 2017 at 9:00 p.m. EST to leave your comments on the Designers Blogs for a chance to win!  The Winners will be posted on the ODBD Blog on December 3rd so be sure to check back there to see if you won!

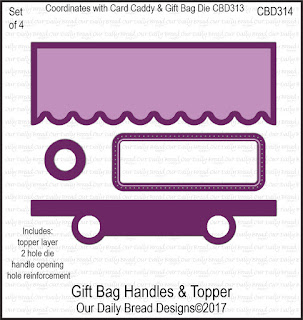
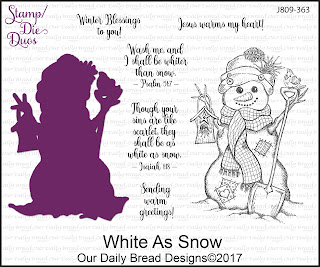
For the gift bag above, I used the new Card Caddy & Gift Bag dies, as well as Gift Bag Handles & Topper dies.  For the sentiment, I used the cut out piece from one of the handles, and a Double Stitched Rectangles die.  I  used the new stamp/die duo set, the White As Snow Stamp/Die Duo and the matching snowman die.  LOVE this set!  I also used the following past released items:  Leafy Edged Borders Die, Snow Crystals diesFence, Bitty Borders, and Lovely Leaves dies.  I created the bag itself with craft paper and I love the craft/white/red combo.  The image is colored with Copics and then with Wink of Stella for some sparkle.  The paper is from the Christmas Paper Collection 2013.

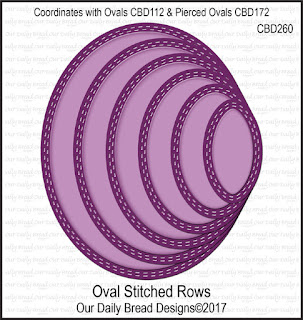
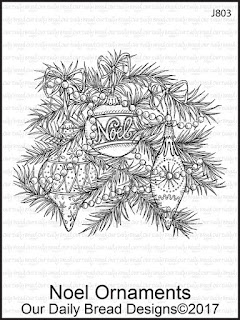
For the card below I used the new Noel Ornaments stamp, colored with Copics, then cut with the new Oval Stitched Rows dies.  I used the Pierced Rectangles dies to cut the green layer, and the Merry Christmas Dies to cut the words from red and gold mirrored card stock.  The  Leafy Edged Borders were used to cut the red border, and the flowers and leaves were cut with the Peaceful Poinsettia, Pine Branches, and Lovely Leaves dies. The paper is from the Holly Jolly Paper Collection and Christmas Paper Collection 2013The image was colored with Copics, then Wink of Stella Clear glitter pen.  In person there is a glimmer but it was hard to capture in the photo.


Here are the NEW products I used today:
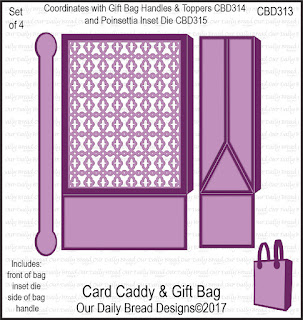
https://ourdailybreaddesigns.com/card-caddy-gift-bag-dies.html

https://ourdailybreaddesigns.com/gift-bag-handles-topper-dies.html

https://ourdailybreaddesigns.com/oval-stitched-rows-dies.html

https://ourdailybreaddesigns.com/country-snowman.html

https://ourdailybreaddesigns.com/noel-ornaments.html

Thank you so much for stopping by today!  Be sure to check out my DT sisters for more inspiration and so you will be eligible for one of the prizes!

Sandee * Lisa * Angie * Cathy 
Grace * Dawn * Chris * Diana 
Helen * Kathy * Lori


Merry Christmas to you all!!!!

Thursday, April 3, 2014

Lead Me to the Cross


Hello friends!  I hope you are doing well!  I seem to be fighting something and hoping it doesn't completely "get me"!  Gotta love those spring time bugs!

Anyway... I wanted to share a card I made for the sketch challenge at SCS this week.  I chose to use this month's release from ODBD, Chalkboard Word Art Background and stamped it twice with Marina Mist ink, so that I could cut it out and add the second panel on top, with the words just carrying on to the next layer.  Well.... it didn't work quite as I had hoped, because subway type chalkboard art is not always lined up with every letter exactly in line with the next.  It's that way by design, but when you cut it up, add a mat and then try to line it up, it looks like it's off.  I fiddled and fiddled with it and if I got one of the lower words looking better, then a top word looked off... and on and on, so this was the best I could do with it.  (Note to self... don't ALWAYS pick the hardest way to get there, Grace!)  LOL!

Our Daily Bread deisgns stamps, The Cross, ODBD Dies, Antique Labels and Borders, Ormamental Cross dies, Vintage Flourish Pattern Dies, designed by Grace Nywening


Anyway... I did have fun playing with new ODBD stamps and dies besides the background.  I used this month's The Cross for my sentiment and cut it with the ODBD Antique Labels and Border Die.  I also cut and layered several sizes of crosses from the Ornamental Cross Dies.  I inked two of them with Marina Mist to match my background.  I popped them up on dimensionals on a mat cut with the new Vintage Flourish Pattern Dies.  LOVE this die set!!!

 I submitted this particular sentiment to the set because at the cross is where I need to stay!  I need to constantly remind myself of not only all that my Savior did for me at the cross, and what that means for my future, but who I am in Christ now, because of that cross!  It's kind of like my card... even if it's not straight, perfectly aligned, etc.... it can still be a blessing to to someone. As His child, even in all my many imperfections, I too can be a testimony to all that Christ has done in my life and all He can do in your lives!  He made something beautiful out of all the imperfections, and He dearly loves me as His own!  His Word says He rejoices over me!  He loves me!  He has plans for me... to give me a hope and a future!  Wow!

One of my many favorite songs is "Lead me to the Cross" by Hillsong.  I included a link to a Utube video that I think will bless your heart.  Enjoy!


Friday, March 28, 2014

A Quote and a Legacy!


Hello friends!  I hope you are all well!

 I have another cards to share with you today that I made with the special 6th Anniversary sets at Our Daily Bread Designs!  This card is made with a quote by Jim Elliot, and is in the Quote Collection 4 set.    I don't know if you know who Jim Elliot was, but he was was an evangelical Christian who was one of five missionaries killed while participating in Operation Auca, an attempt to evangelize the Huaorani people of Ecuador.  He was only 28 years old when he was killed by the Huaorani Indians, but the story of his life, and the lives of the  people who killed him after his death will be a real blessing if you ever have time to read his story or watch the movie. Jim's wife Elisabeth Elliot wrote a couple of books about his life and death, the most notable of which is Through Gates of Splendor.  A documentary based on the story was also made, called Beyond the Gates of Splendor.  Another movie I have seen and highly recommend, called End of the Spear, is based on the story of the pilot of the group of missionaries, who also was killed at the same time, Nate Saint, and the return trip of Nate's son attempting to reach the natives of Ecuador. I marvel that some of the family members of those five missionaries including Elisabeth Elliot, did go back to the same place and ministered to and lived among the very people who killed their loved ones!    
 
Jim's journal entry for October 28, 1949, expressed his belief that work dedicated to Jesus was far more important than his life (see Luke 9:24 in the Bible). "He is no fool who gives what he cannot keep to gain that which he cannot lose."  Given that dedication to God, the above quote takes on even more meaning in my opinion!  Can we even imagine what's God's best is?  For Jim... for the Huaorani Indians... for the families... God is so much bigger than we can begin to understand!  We see his death at such a young age and wonder "why".  God... sees the bigger picture and had an incredible plan to save many!!!

Besides the ODBD Quote Collection 4, I used the ODBD Elegant Oval dies and Fancy Foliage Die.  The base is ivory, and the designer paper is a Kirby Teesdale Pack by Paper Studio (Hobby Lobby).  I used a variety of flowers, May Arts silk ribbon, snips of lace from my stash, and lots of sponge distressing for a vintage feel.

I am linking this to the ODBD Shining the Light Challenge for this week and next... to have fun with ODBD stamps!  I am also sharing it with Word Art Wednesday, which is anything goes with a Scripture or uplifting sentiment.

Before I go, I want to remind you that you have one more day to take advantage of the special Easter Sale goingon at ODBD!

 Through Saturday, March 29, 2014 11:00PM EDT, you can SAVE 20% on all ODBD Easter Stamp Sets and Singles!*  when you enter code EASTER20 at checkout. (Sorry, no rainchecks, retail customers only)
Click here to visit the website.

Thank you so much for stopping by,looking at my card, and for reading my thoughts today!

Blessings,  


Thursday, March 27, 2014

Celebrate Life!

Hello friends!  I have one more quick card to share using the special release of the ODBD 6th Anniversary  Sets!  This card uses a sentiment from Sentiment Collection 3.  I also used the Blooming Garden Paper Collection, the ODBD Recipe Card and Tags Die, and the Decorative Corners Dies.  I used an embossing folder to emboss the outer frame, and I scored the inner frame.  A pretty soft sheer ribbon and gold cord tied simply in the center keep this card flat and mailable, which is always a good thing!   I hope you have enjoyed all the samples with these special Anniversary sets!  I know you won't want to miss the April 1st release so until then....Thanks so much for looking! 

Blessings,

Saturday, February 1, 2014

Welcome to the ODBD Feb. release!


Hello Friends!  Welcome to the Feb. ODBD Release!!! I think you are going to fall in LOVE with this release!

Before I tell you about my card, let me just give you the details on how you can win some stamps!

 Three winners will be randomly chosen from the comments left on the designers blogs to receive a $25 Gift Certificate to the ODBD Store, to be used toward the purchase of ODBD Stamps.  You have until February 2, 2013 at 9:00 p.m. EST to make your comments!  The Winners will be posted on the ODBD Blog on February 3rd, so be sure to check back there to see if you won!

For this card, I wanted a very vintage feel, and a place to tuck in a little message, so I created a pocket card.  I stamped the Flourish heart with ColorBox Bronze ink and die cut with the largest heart in the Custom Ornate Hearts Die set.  I used a base of cream, added my designer paper, then the large heart.  On that I matted an old postcard that I found in my Mother in Law's things when we cleaned out her apartment before she went in to a nursing home.  It is so cool... it's actually a change of address post card from the PO, and it has "place one cent stamp here" on the front.  I don't know when post cards were 1 cent but that's how old this is and it really tickled me. There were only a couple so it was hard to ink it, but I do love how it feels on this card, and I added some texture to it by embossing it with a heart border from a Sizzix ATC folder.   Under the post card I placed some "paper lace", using the new Beautiful Borders die cut. I added one tiny heart where the one cent is to go, also die cut from the Ornate Hearts die set.  On top of all that is my pocket, created with pink vellum behind the lacey die cut from the Ornate Heart Die set.  I stamped one sentiment on the post card, and one on a tag, cut with the ODBD Custom Recipe Card and Tags die set.    Everything is sponged with Distress Ink to antique it a bit.

Card Recipe:
Stamps: ODBD Flourish Heart (Large Heart), Be Mine (I Adore You Sentiment), Clean Heart (Partial sentiment on tag)
Ink:  ColorBox Bronze, T Holtz Distress Inks
Accessories:  Old Post Card, , May Arts Silk Ribbon, Prima Flowers, Vintage Amore designer paper from Paper Studio, Sizzix Embossing Folder 


For my second card, I went a little more masculine.... or at least that was my intention.


The card base is 5 x 5.5" and then I popped up in tent topper style another panel, so the card would get mailed in a 5 x 7  or 6" square envelope.  The hearts are stamped with Real Red  and cut out with the coordinating ,Ornate Hearts Dies.  The largest heart is from the Heart of Joy set.   The little hearts are all cut with a smaller die in the Ornate Die set, and I stamped little sentiments that reminded me of conversation hearts (from Be Mine and Clean Heart sets)... but I "hung" them in banner form from the twine.  I stamped the smaller heart design several times to make the background for my horizontal panel, and added one to the top.... also cut with the die.I decided to keep it clean and unfrilly so it could be used for a guy.


Card Recipe:
Stamps: ODBD Heart of Joy, Clean Heart, Be Mine
DiesODBD Custom Ornate Hearts
Ink: Real Red
Accessories:  Anna Griffin Embossing Folder, Baker's Twine, Heart Brads


Here are the new ODBD products used for today's cards:


For More inspiration and projects that will blow your mind, please visit my DT sisters:
Stacy * Dawn * Grace * Chris * Cathy * Sandee * Julie * Sabrina * Lori * Wanda * Lisa * Silke * Audrey * Angie

To see the full release and lots of inspiration in one place, please see THIS POST on the ODBD Blog!


Thanks so much for stopping by!


Sunday, July 17, 2011

Pop Up Bouquet

SSIC-2-pop-up-hydrangea-fro

Hello my friends!  Happy Sunday!  With Sunday comes another Stampin Sisters in Christ Challenge!  This week, our challenge hostess is the talented and sweet Kristine!  Kris has chosen 2 Samuel 6:14 "And David was dancing before the LORD with all his might, and David was wearing a linen ephod." 

Her challenge is DANCING - Make a card that "moves" (ie. tilt card, slider, pop up, waterfall, etc. - LOTS on scs resources)
 
picnikfile_bFPgVG

I decided to make a pop up card, and I put my main image inside instead of on the front.  I wanted it to feel like I am giving the recipient a bouquet of flowers, so that is why I wanted the image to pop up rather than a sentiment.  I used this month's release from Our Daily Bread designs, Hydrangea.  I love this image! I love coloring it in all different colors!  I also have mounted it on a Cheery Lynn Die, French Pastry Doily.  For the pop up itself, I used acetate because I didn't want colored card stock to show through the doily.  For the front of my card, I used Our Daily Bread designs Mini Tags 1 and the Spellbinders Ribbon Tag Trio 3 that it was custom made to fit.  I also used an MS Shell edge punch and a Cheery Lynn Fanciful Flourish and Lattice frame.  LOVE these dies!!!   On the inside I used a Sizzix embossing folder for the future message.

I do want to mention that Cheery Lynn is having a Design Team Call and if you love dies, this would be a great team to be on!  Check it out here!

SSIC-pop-up-hydrangeas

My papers are: SU! Marina Mist, SU! Very Vanilla, SU! retired Certainly Celery dp, K&Co Cottage Garden dp.  I stamped the sentiment with Marian Mist, then the tag itself with Certainly Celery.  The image is stamped with Memento and colored with Copics: B37, B34, B32, G99, G82, G40.  The ribbon is SU! and the little rose buds are ZVA Creative.

Our Sponsor this week is  Designed2Delight
The prize is a $10.00 store credit!
Please be sure to stop by the Stampin Sisters in Christ Challenge Blog for the full devotional and challenge details.I know Kris will bless you with her thoughts on today's verse.  I love thinking about the joy with which David expressed his love for the Lord.  He as all out for his Lord and wasn't ashamed to show it.  Perhaps that's just one of the reasons God said he was a man after His own heart! 
For more inspiration please visit my DT Sisters:
Chris, Linda, Peggysue, Miesje, Rebecca, Lisa (on break), Kris, Sabrina, & MariLynn
Randi (on leave)


I am entering this in the following challenges:

Allsorts - #110 July long Free & Easy, Craft Your Days Away  - Fancy Folds, Card and Scrap - Use Punches/Dies, Crafty Catz -  tag, Aud Sentiments Challenge -  Sentiment with at least two words, Delightful Challenges - fancy folds, Moving Along With The Times -  favourtie things (doily, hydrangeas),  Stamp Insanity - summer colors, Freshly Brewed -  #55 3 of anything (rose buds), Simon Says Stamp - anything goes, Creative Craft Challenges -  Pretty Blossoms, Going Grey With Scrap-Creations -  At least 2DP's & at least 2 Embellishments, Jac-Inks Papercraft Challenges -- Die-cuts Plus Texture, Crafty Catz - tag, Bling it on - anything goes, Paper Pal Arts - summer time and living is easy, Really Reasonable Ribbon- cool it ( I used cool blues)


Hope you like my pop up card!  Have a wonderful week!  Sorry my post is short today.  I am looking forward to my sister arriving and will probably not be a very good blogger while she is here.  I have not seen her in a year and we have lots of catching up to do! Thanks so much for stopping by~ and for your kind comments!  I love knowing you were here!

Wednesday, December 1, 2010

Our Daily Bread designs Dec release Blog Hop

Silver-Ornament-Set

Hello everyone! Welcome to the December Our Daily Bread designs Release Blog Hop! If you came from Angie's Blog, you are in the right place, but if you just happened on my blog you should go to the ODBD Blog and start from there, and if along the way any links are broken simply return to the ODBD blog where the entire list will be listed in order. You can always go on to the next person and check back later for the missing one. The Hop will run from 8am Eastern Dec. 1 to 8pm Dec 2. The winners will be announced on the ODBD Blog on Dec. 3. There will be 4 prizes. Kelley has very generously offered to give Three prizes of Choice of One set, and One GRAND PRIZE of the December Bread Basket Bundle!!!! Whoo Hoo!!! The prizes are hidden on various blogs along the hop, so it is important that you visit and comment on each one!

All you have to do to be eligible to win one of these great prizes is comment on each blog on the hop, then return to the ODBD Blog and leave us a comment there:
1. Telling us you completed the hop and noting any blogs you could not comment on
2. Answer the question that is posted on the ODBD Blog post for this hop.
3. Cross your lucky fingers and toes and hope that one of the bloggers who have the hidden prizes pick YOU! Be sure to check the ODBD Blog on Dec 3rd to see if you won! :)


Silver-Ornament-set2

Now on to my project! I decided to make some ornaments with the new set, "Ornaments". As I'm sure you know... ODBD is so pleased to have been chosen a Spellbinder's Preferred company, and this set is our first custom made set to fit the Spellbinder's Heirloom Ornament Die set. I have loved using this stamp to make cards but for something different, I stamped with Stazon Silver Ink onto acetate and they stamped like a dream!!! I then used the largest and second largest Spellbinders Heirloom Ornament die to cut out and emboss my brushed silver cs from Hobby Lobby, making a frame for the acetate. I strung some beads onto a thin wire and secured that to the inside of the bottom of the ornament, and then I secured a ribbon loop to the top. Then I sandwiched the acetate between two silver borders and glued together. Since I don't have my Christmas tree up yet, I decided to tape these to my window to show you how they look hanging... and it gave me an idea! My DMIL is in a nursing home and can't have a tree in her room, but still enjoys a little decoration during the holidays, so she does have a large window, and how pretty would these look as sun catchers in her window!?

Silver-Ornaments-in-window

So that gave me the next idea... to make a gift box to send them in. I used my Cricut and my "Boxes, Bags and Tags" cartridge to cut the box out, using the same silver cs. Once cut I centered my largest ornament die cut on the box top and cut and embossed it. using the die as a template, I hand drew a 1/4" smaller one from this pretty patterned silver and white cs (also Hobby Lobby) and cut that out. I stamped another ornament on acetate and attached to the back of the cover, along with the silver and white mat I had cut. The border on the box is simply four Spellbinders corner dies and little strips to fit behind them to give just a little more interest to the box. I tied it all up with a May Arts Sheer Ribbon and done. I hope these will put a smile on my elderly Mother in Law's face to have some pretty decorations in her room this Christmas!

Silver-Ornament-Box

I hope you enjoyed my projects today! From here, hop on over to Becca's Blog for some GREAT inspiration from one talented lady!!!

I am entering this in the Shabby Tea Room Get in Shape challenge.

Be blessed, and have a wonderful Christmas, celebrating the birth of our Savior!

Tuesday, July 6, 2010

ODBD Bread Scripture book and Tutorial


Hello everyone! Happy Tuesday! Today I have a little project I made using the newly released July Our Daily Bread designs sets "Our Daily Bread" and "The Living Bread". As promised, I'm going to do a little tutorial on how I made this Scripture book, focusing on how I made the bread shaped pages. I looked everywhere for this shape in a template somewhere and could not find one, so this is how I came up with my own:

Materials Needed:
Cardboard
Sturdy Card Stock (I used Papertrey Vintage Cream)
Adhesive (Good Glue Stick or TomBow Multi)
Sanding block
Magic Matter Tool or other means to mat 1/4" onto shape
Paper snips
Craft blade
1" Ring

1. Fold a piece of printer paper in half and draw the shape of a half slice of bread.

2. Cut out the shape you drew and open fold. You now have a full "slice" of bread. My scripture book measures about 6" high and 6" across at the widest part of the bread. The recipe book I made is about 4.5" in both dimensions. It's up to you and what you want to fit on the pages.


3. Trace your pattern on heavy card stock making one for each page you want. (If your cardstock is not heavy you might want to do chipboard or cardboard for all your pages. I just used cardboard for my covers)

4. Cut the paper shapes and stack up to be sure they are cut the same. Clean up any little differences.

5. Using a Magic Matter Tool (which adds an even mat to any shape) trace around your paper pages onto your cardboard, adding 1/4". Cut two.


6. Cut out your cardboard covers out.

7. Trace the cardboard shapes onto cardstock and cut out. This will cover your cardboard for a finished look. If you are not using designer paper to decorate your covers, cut 4 cream or white cs. If you are decorating with designer paper, just cut 2 from cs and cut 2 from your designer paper choices.


8. With a good quality glue stick or TomBow Multi Glue, apply adhesive to cardboard.


9. Adhere card stock to each cover. If using designer paper, adhere cs to just one side of each cover and repeat process with your designer paper.

10. When adhered, trim any areas that are not exactly even using your craft blade.


11. Using a sanding block, smooth out your edges until you are satisfied with the look.


Now you are ready to decorate your pages! When finished, line up all your pages exactly together and punch holes and insert rings to hold book together. Add ribbons as desired. Here are some of my pages... I'll be adding more, which is the great thing about the rings... you can always add to your book!


Supplies Used for decorating pages:
Designer Paper: BasicGrey Origins, Prima First Blush, K&CO Ancestry
Ink: Versafine Vintage Sepia, TH Distress Inks
Accessories: Spellbinder's Labels 5, 7, 11, 13, Contemporary Hearts Pendant, Nellies Multi DieCut, QuicKutz Corner Die Cut, ZVA Creative Pearls and silk flowers, MS Punch, May Arts Wrinkled Ribbon, Lace, Prima silk flower, Joy die cut scroll, Misc. pearls